In this post, I’m going to be sharing my experience using Tailwind Create to design pins for myself and clients on Pinterest. This post is sponsored by Tailwind and if you join Tailwind using my links, I will receive a small commission, at no additional cost to you. Your support helps me continue to create free content for you. As always, my opinions are always my own.
I’ve been using Pinterest and Tailwind as marketing tools for myself for over 8 years, and have worked with clients to grow their brands on Pinterest for the past 5 years. I also teach you everything there is to know about Pinterest, and how to use Tailwind as a platform for growth. Learn more here.
That being said, when Tailwind launched their new Tailwind Create a feature for Pinterest, I was so excited to test it out. I’m always looking for new design elements that can help myself and my clients stand out on Pinterest and Tailwind has managed to create a tool to do just that.
I started testing out Tailwind Create back in November (2020), with one of my clients and with my own account. On my own account, I was creating pins for blogs and with my client, I was actually creating pins for products that they sell with Shopify + Pinterest.
I was unsure at the start that Tailwind Create would be able to design nice pins for a product, but with the right imagery their pins looked amazing and we saw great results with their audience.
SNow let’s walk you through how to use Tailwind Create and a few of my tips.
Step One: Branding your Tailwind Create Pins
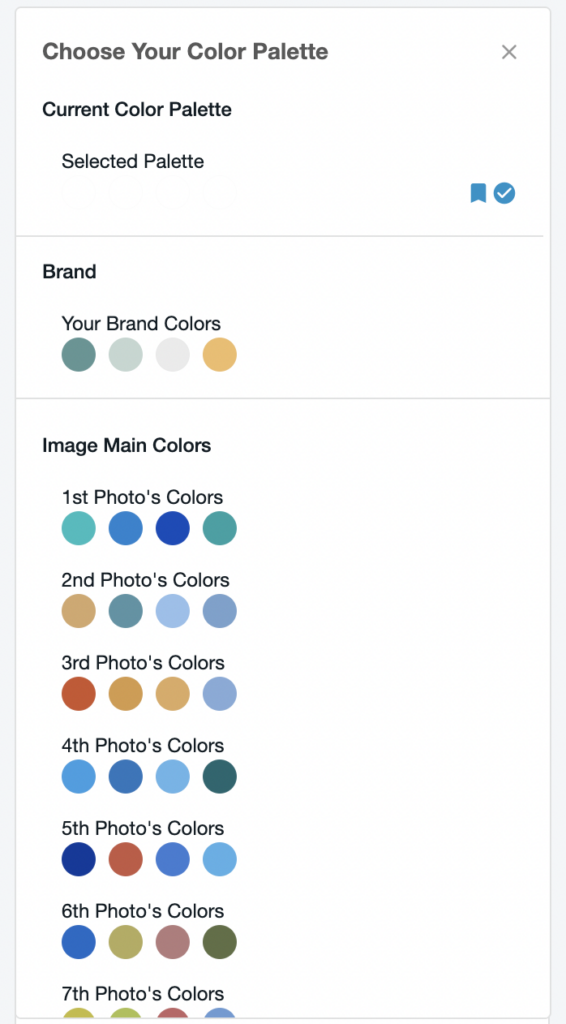
When you first open Tailwind Create you’ll notice that you have the opportunity to enter your brand details. Make sure you do this very first. If you don’t start with your own branding elements then the pins won’t look unique to you.
The main goal on Pinterest is to stand out and stay unique. This means always incorporating your branding elements into every pin design.
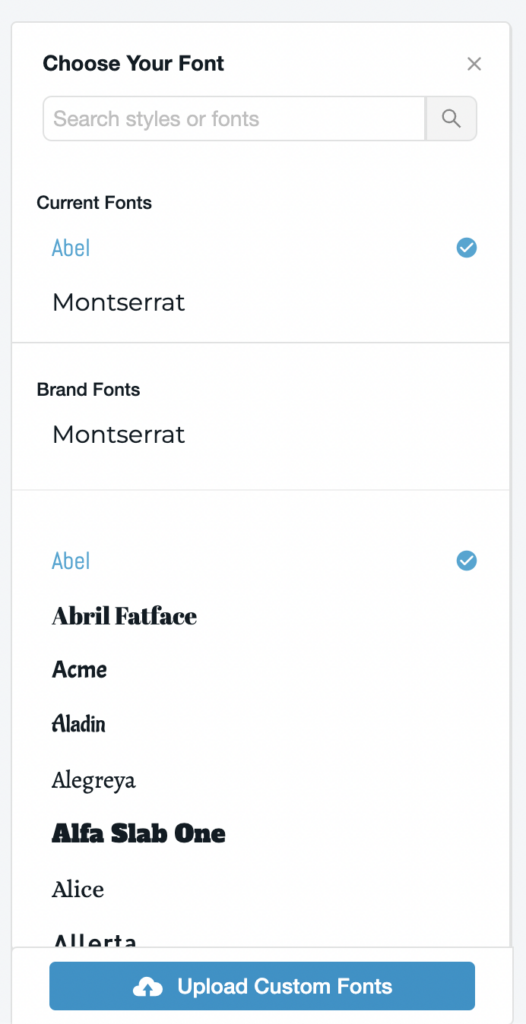
You can do a lot with the Tailwind Create plan included in your yearly membership. But if you haven’t upgraded your Tailwind Create account, then you won’t be able to add your own fonts. This is the main reason why it was such a no-brainer for me to upgrade. My fonts are such an essential part of my branding, I just knew that my pins wouldn’t look right without them.
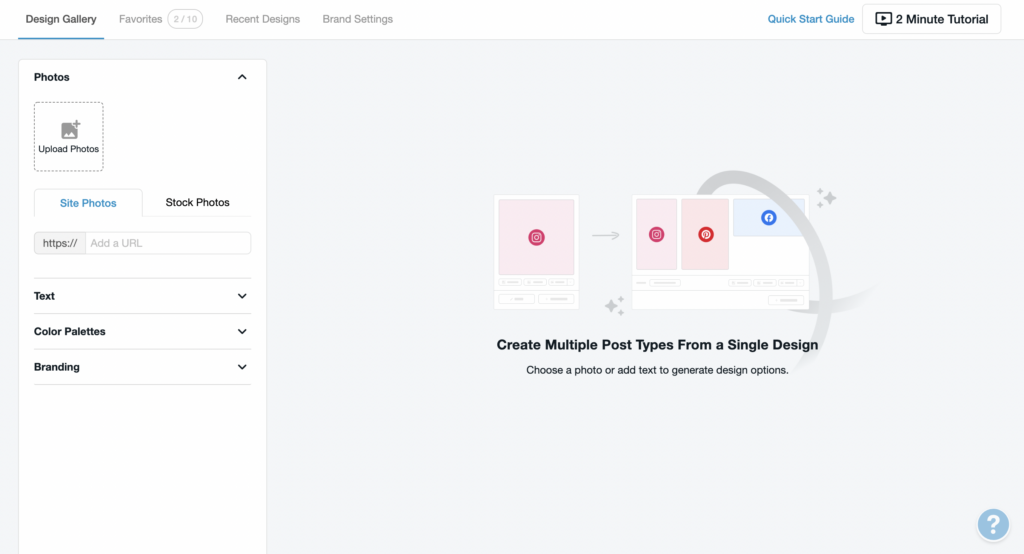
Step Two: Adding post elements
After you’ve added your branding elements into Tailwind Create, you’re going to need to add the specific post that you want to create pins for. Now, this can be any blog post or product that you want. What I love most about this step is that you can load the images from your post directly in Tailwind. You don’t have to worry about downloading and uploading all the images.
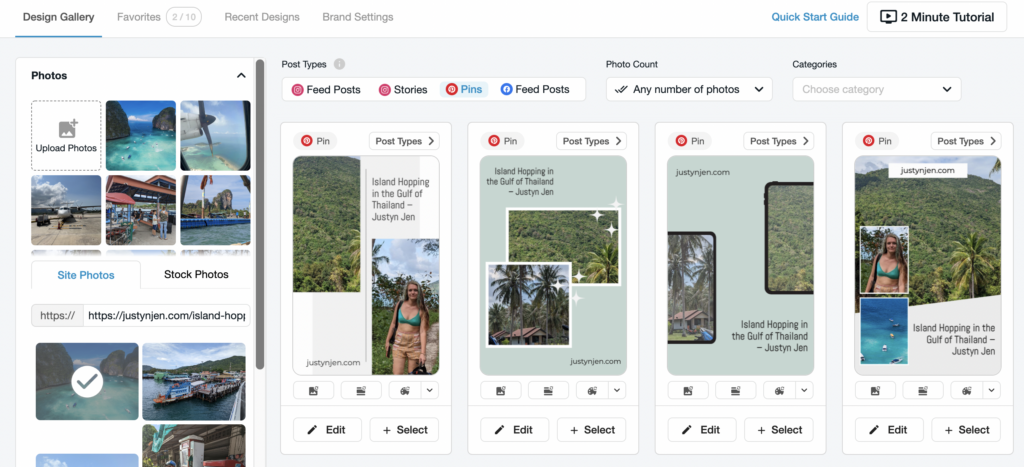
Step Three: Choosing your Tailwind Create designs
Now, this is the fun part! And the part that’s going to take the most time. The goal of Tailwind Create is to help users create high-quality pins, without having to have a background in design. When you click create (after adding your post URL, title, and images) Tailwind is going to spit out a lot of pins.
Here’s the thing though. You don’t actually need that many pins. The point of this is to scroll through and find the designs that really resonate with your brand or post. My recommendation is to settle on 3-4 designs for each post. You can edit and refine them and then save the design in your favorites for next time.
Step Four: Scheduling your new pins
It’s that easy! Once you’ve found the designs you love, they’re added directly into your drafts in Tailwind with the titles and links already loaded. You can easily add a description, add them to communities and loops and schedule them to post to Pinterest.
It’s amazing how easy it is to get high-quality designs, without having to worry about creative designs yourself. You simply get to scroll through and find the designs that fit right for your brand.
Now as I said, you can do a lot with Tailwind Create for free. But the biggest reason to upgrade your account is the ability to upload your own fonts to the platform. That’s going to help you take your pins to the next level.
Support me for free by sharing this post! You can also check out more of my Pinterest + Tailwind free Resources HERE and if you’re ready to take the leap and join the Pinterest Playbook Course, click HERE.